

Cloud Resume Challenge - Block 2 (Steps 4-6)


Steps 4-6 of the Cloud Resume Challenge consist of the following:
Deploy the Resume on an Azure Static Website
Secure the Static Website with HTTPS using an Azure CDN Endpoint
Point a Custom DNS Domain Name to the Azure CDN Endpoint
Deploying the static website
In order to deploy the static website, I started by creating a new Azure Storage Account specific to this project. I left the default settings during the setup wizard, and chose the following tags that I'll use throughout the project, to make it easier to know which resources are used for this project in the future:

I've also created the following Resource Group for a similar purpose:

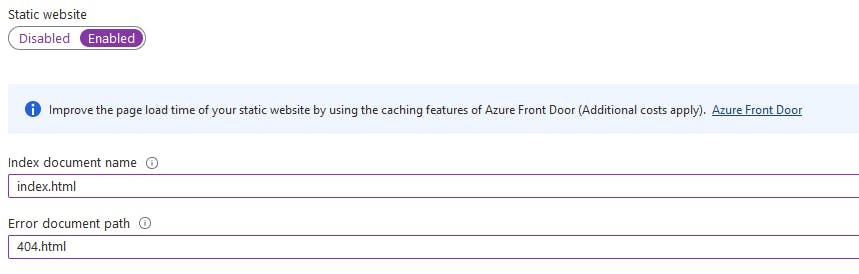
Using the Microsoft documentation as a guide, I configured the static website capabilities with the following settings:
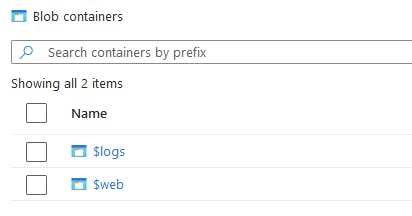
I now have the $web blob container available:
I uploaded my cloud resume files to the $web folder and attempted to access the new cloud resume link, however it was blocked since blob anonymous access is not enabled by default in Azure Storage. I enabled anonymous access for the storage account and $web blob container, and am now able to access the publicly available site.
Secure the Static Website with HTTPS using an Azure CDN Endpoint
Similar to the deployment of the static website, I started by following the Microsoft Documentation to enable Azure CDN access to my storage account. Following these, I deployed a new Azure CDN to the storage account. This step was pretty straightforward. I added the same tags as I used for the storage account, for resource tracking.
Point a Custom DNS Domain Name to the Azure CDN Endpoint
While it is possible to purchase a domain name within Azure, I'm choosing to use CloudFlare instead, so the domain itself is outside any specific cloud platform. The specific domain I registered is mjresume.work.
Within my CloudFlare domain settings, I set the CNAME record to az.mjresume.work, and then set this as the custom domain setting in my Azure CDN. It took about 10 minutes before I could link the domain, likely due to the DNS record needing to propagate.
Next, I selected the option to Configure Domain HTTPS within the CDN endpoint.

Once completed, the secure cloud resume can now be accessed from https://az.mjresume.work, with delivery managed via Azure CDN.
Notes & Lessons Learned
A few things I learned from this exercise:
It takes about 10 minutes for a newly registered domain to propagate. I think I knew this from previous studies, but it was interesting to observe in action while setting up a new solution.
While setting up the CDN solution is not necessarily practical for a static website serving a simple resume document, it is good practice for situations where it will need to be set up in the future.
The first time I set up the CDN, I pointed it to the storage blob itself, which then did not allow the new URL to reach the website. I had to set up a new CDN to point to the static website itself.
I did encounter an issue where I started and then stopped the action of setting up HTTPS on the CDN endpoint. When I tried to re-enable it, I received a message that it would take about 8 hours to cleanse the previous action before I could enable it again. For the purpose of the lab, I just set up a new CNAME in my DNS settings, however this is a good lesson learned for situations where there might not be the flexibility to simply use a different DNS record.
Next Steps
The next steps of the challenge that I will undertake are:
Deploy a Cosmos DB Database for Visitor Counter Data
Deploy an API for the Visitor Counter to Commumicate to the Cosmos DB Instance using Azure Functions
Update the Azure Function using Python
I'm postponing step 7 for creating a JavaScript visitor counter, since at this stage in the project, there is no database to point the counter to. I'll revisit this in a future block.